#PC USB Oscilloscope with Logic Analyzer
Explore tagged Tumblr posts
Visit Tumblr Blog
Explore Tumblr blogs with no restrictions, modern design and the best experience.
Last Seen Tumblr Blogs


Fun Fact
In February 2021, Tumblr had 518.6 million blog accounts.
Text

Ajitek Tech Solutions Pvt Ltd
1 note
·
View note
Text
PC USB Oscilloscope with Logic Analyzer
PC USB Oscilloscope with Logic Analyzer
Is the best Today has a vibrant and professional engineering team, which is engaged in providing sales, technical support and system integration services on the products it handles and designs.
0 notes
Text
Pocket Science Lab - An Open Source Hardware for Electronics Teaching & Learning
New Post has been published on https://www.aneddoticamagazine.com/pocket-science-lab-an-open-source-hardware-for-electronics-teaching-learning/
Pocket Science Lab - An Open Source Hardware for Electronics Teaching & Learning

PSLab is a small USB powered hardware extension for your Android phone or PC that lets you measure all kinds of things. PSLab comes with a built-in Oscilloscope, Multimeter, Wave Generator, Logic Analyzer, Power Source, and we are constantly adding more digital instruments. PSLab is many devices in one. Simply connect two wires to the relevant pins and start measuring. You can use our Open Source Android or desktop apps to view and collect the data. You can also plug in hundreds of compatible I2C standard sensors to the PSLab pin slots. It works without the need for programming. So, what experiments you do is just limited to your imagination! PSLab is developed by FOSSASIA and OpnTec in collaboration with a global community of Open Source developers.
Speaker: Wai Gie
Pocket Science Lab (PSLab) is an Open Source hardware device (open on all layers) that can be used for experiments by teachers, students and citizen scientists to learn and teach electronics. The hardware comes with a firmware, desktop app, android app – all open source. This tiny pocket lab provides an array of sensors for doing science and engineering experiments. It comes with functions of numerous measurement devices including an oscilloscope, a waveform generator, a frequency counter, a programmable voltage, current source and as a data logger. During this session, Wai Gie will speak about the project development and current use cases of the device through a short demo. Event Page: https://geekcamp.sg/
Produced by Engineers.SG
#citizen scientists#FOSSASIA#Logic Analyzer#Multimeter#Open Source hardware device#oscilloscope#Pocket Science Lab#Power Source#PSLab#students#teachers#used for experiments#Wai Gie#Wave Generator
0 notes
Photo

[SALE!] $89.0 LOTO OSC482X 2CH USB PC Virtual Oscilloscope + Signal Generator + Logic Analyzer CLICK HERE!
0 notes
Text
0 notes
Text
Real World Instrumentation with Python
Real World Instrumentation with Python Download Introduction This is a book about automated instrumentation, and the automated control systems used with automated instrumentation. We will look at how to use the Python programming language to quickly and easily implement automated instrumentation and control systems. Automated instrumentation can be found in a wide variety of settings, ranging from research laboratories to industrial plants. As soon as people realized that collecting data over time was a useful endeavor, they also realized that they needed some way to capture and record the data. Of course, one could sit with a clock and a pad of paper, staring at thermometers, dials, and gauges, and write down numbers or other information every few minutes or so, but that gets tedious rather quickly. It’s much easier—and more reliable—if the process can be automated. Fortunately, technology has advanced significantly since the days of handwritten logbooks and clockwork-driven strip chart recorders. Nowadays, one can purchase inexpensive instrumentation for a wide variety of physical phenomena and use a computer to capture the data. Once a computer is connected to instrumentation, the possibilities for data collection, analysis, and control begin to expand in all directions, with the only real limitations being the ability to implement the necessary software and the implementer’s creativity. The primary objective of this book is to show you how to create software that you can use to get a capable and user-friendly instrumentation or control application up and running with a minimum of hassle. To this end, we will work through the steps necessary to create applications that incorporate low-level interfaces to the real world via various types of input/output hardware. We will also examine some proven methods for creating programs that are robust and reliable. Special attention will be paid to designing the algorithms necessary to acquire and process the data. Finally, we will see how to display the results to a user and accept command inputs. It is my desire that you will find ideas here that you might take away and creatively apply to meet your own needs in a wide variety of settings. Who Is This Book For? This is a hands-on text intended for people who want or need to implement instrumentation systems, also known as data acquisition and control systems. You might be a researcher, a software developer, a student, a project lead, an engineer, or a hobbyist. The application might be an automated electronics test system, an analysis process in a laboratory, or some other type of automated instrumentation. One of the objectives with the software in this book is that it be as platform-independent as possible. I am going to assume that you are comfortable with at least the Windows platform, and Windows XP in particular. With Linux I’ll be referring to the Ubuntu distribution, but the discussion should apply to any recent Linux distribution and I will assume that you know how to use either the csh or bash command-line shells. Since this is a book about interfacing to the real world via physical hardware, some electronics are involved, but I am not going to assume that you have an extensive background in electrical engineering. Chapter 2 contains an overview of the basics of electronics theory as it relates to instrumentation, for those who might benefit from it. It turns out that it really doesn’t take a deep level of electronics knowledge to successfully interface a computer with the physical world. But, as with anything else involving technology, it never hurts to know as much as possible, just on the off chance that things don’t quite work out as expected the first time. Regardless of the type of work you do, or where you do it, the main thing I am assuming that we have in common is a need to capture some data, and perhaps to generate control signals, and to do so through some kind of computer interface. Most importantly, we need the instrumentation and control software we create to be accurate, reliable, and relatively painless to implement How This Book Is Organized This book is organized into 14 chapters and 2 appendixes. The first 12 chapters set the stage for the implementation examples described in Chapter 14. Chapters 1 through 6 introduce basic concepts that the advanced reader may elect to skip over. Here’s a closer look at what you’ll find in each chapter: Chapter 1, Introduction to Instrumentation Chapter 1 provides an overview of what instrumentation is, how control systems work, and how these concepts are used in the real world. The examples covered include automatic outdoor lights, test instrumentation in an electronics engineering environment, control of a thermal chamber in a laboratory, and batch chemical processing. Chapter 2, Essential Electronics Because this is a hands-on book, we will need to know something about the physical hardware we want to interface to and have at least a general idea of how it works. This chapter starts off with an introduction to the basic concepts of electricity and electronics. It then explores the functional building blocks for data acquisition and control, including discrete digital interfaces, analog interfaces, and counters and timers. Lastly, it reviews the basic concepts behind serial and parallel interfaces. If you are already familiar with electric circuit theory and devices, you could skip this chapter. However, I would recommend that you still at least skim through the material, on the off chance that there might be something unique here that you can make use of later. Chapter 3, The Python Programming Language Although this book is not a tutorial on Python, this chapter provides an introduction to the core concepts of Python and summarizes the basics of the language. The primary emphasis is on the features of Python that will be used frequently in this book. This chapter also provides a brief overview of the tools available to make life easier for the person doing the programming, and where to go about finding them. Chapter 4, The C Programming Language Here, the C programming language is introduced in a high-level overview. The objective is to provide enough information to enable you to understand the examples in this book, without delving into the arcane details. Fortunately, C is a relatively simple language, and the information in this chapter should be sufficient to get you started on creating your own extensions for Python. Chapter 5, Python Extensions This chapter describes how a Python extension is created, and what extensions are typically used for. Examples are provided, both in this chapter and in later chapters, for you to use as templates for your own efforts. Chapter 6, Hardware: Tools and Supplies Although is it possible that one could implement an instrumentation system and never touch a soldering iron, there is a high probability that some screwdrivers, wire cutters, and a digital multimeter (DMM) will come in handy. In this chapter I provide a list of what I would consider to be a basic toolkit for doing instrumentation work. It isn’t much and could all easily fit in a small box on a shelf somewhere. However, there could very well come a time when you really need to see what’s going on in your system. To this end, I’ve included a discussion of the two pieces of test equipment that can help you eliminate the guesswork and quickly get to the root of an interface or control problem: the oscilloscope and the logic analyzer. This chapter also covers what types of instruments are available and provides some suggestions for deciding between buying new equipment or picking up something used. Chapter 7, Physical Interfaces Chapter 7 examines the types of interfaces one is most likely to encounter when attempting to interface Python to data acquisition or control instrumentation. RS-232 and RS-485, the two most commonly encountered types of serial interfaces, are examined from an instrument interface perspective. This chapter also covers the basics of USB and GPIB/IEEE-488 interfaces, along with a discussion of where one might expect to encounter them. Finally, we turn our attention to I/O hardware designed to be plugged into the bus of a PC, typically PCI-type circuit boards, and what one can typically expect in terms of API support from the hardware vendor. Chapter 8, Getting Started This chapter contains a description of a proven approach to software development. It is included here because, when implementing an instrument system in any language, it is essential to plan and define what is to be implemented, and then to test the result against the expectations captured in a set of requirements. By extending the reach of Python into the real world, we open the door for the uncertainties and vagueness of the real world to wander back in and impact—sometimes severely— the instrumentation software. Chapter 9, Control System Concepts A book on real-world data acquisition and control would be incomplete without a discussion of control systems and the theory behind them. Chapter 9 expands on the concepts introduced in Chapter 1 with detailed examinations of common control system concepts and models, including topics such as feedback, “bangbang” controllers, and Proportional-Integral-Derivative (PID) controls. It also provides an introduction to basic control system analysis and provides some guidelines for choosing an appropriate model. Lastly, we’ll look at how the mathematics of control systems translates into actual Python code. Chapter 10, Building and Using Simulators Chapter 10 examines simulators and how they can be leveraged to speed up the development process, provide a safe environment in which to test out ideas, and provide some invaluable (and otherwise unattainable) insights into the behavior of not only the instrumentation software, but also the device or system being simulated. Whether because the instrumentation hardware just isn’t available yet or because the target system is too valuable to risk damaging, a simulation can be a quick and easy way to get the software running, test it, and have a high degree of confidence that it will work correctly in the real world. Chapter 11, Instrumentation Data I/O In this chapter we’ll look at how to use the interfaces that were introduced in Chapter 7 to move data between the real world and your applications. We’ll start with a discussion of interface formats and protocols in order to define the basic concepts we will need for the upcoming software examples, and then we’ll take a quick tour of some packages that are available for interface support in Python with the pySerial, pyParallel, and PyVISA packages. Lastly, I’ll show you some techniques to read and write instrumentation data. We’ll take a look at blocking versus nonblocking I/O, asynchronous input and output events, and how to manage potential data I/O errors to help make your applications more robust. Chapter 12, Reading and Writing Data Files Chapter 12 examines some of the implementation considerations and techniques for saving instrumentation data in a variety of file formats, from plain ASCII and CSV files to binary files and databases. We’ll also examine Python’s configuration data file capabilities, and see how easy it is to store and retrieve configuration parameters using Python’s library methods. Chapter 13, User Interfaces Unless an application is deeply embedded or specifically designed to run as a background process, it will probably need some type of user interface. Chapter 13 examines what one can do with just the command line and the curses screen control package for Python, and how to use an ANSI-capable terminal emulator program to display data and accept input. The chapter wraps up with a look at the TkInter GUI toolkit provided with the standard Python distribution, and also provides an overview of the wxPython GUI package Chapter 14, Real World Examples In Chapter 14 we look at several different types of devices used for data acquisition and control applications. This chapter starts with an example of capturing the continuous data output from a digital multimeter. We then examine a common type of data acquisition device that uses a serial interface for command and data exchanges. Lastly, we wrap up with a detailed look at a data I/O device with a USB interface and its associated API DLL provided by the vendor. The selected devices illustrate key concepts shared by almost all instrumentation components, and the examples draw on earlier chapters to show how the theory is put into practice. Via TimoBook
0 notes
Text
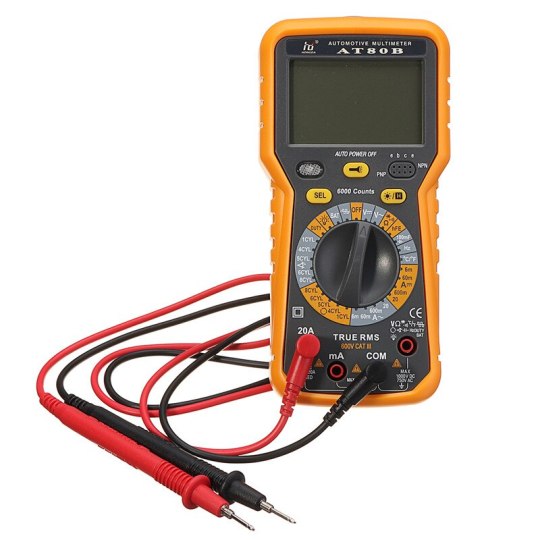
New Arrival Digital Multimeter Portable Multi Meter AC/DC voltage meter DC Ammeter Resistance Tester Voltmeter Ammeter Ohmmeter
New Arrival Digital Multimeter Portable Multi Meter AC/DC voltage meter DC Ammeter Resistance Tester Voltmeter Ammeter Ohmmeter
New Arrival Digital Multimeter Portable Multi Meter AC/DC voltage meter DC Ammeter Resistance Tester Voltmeter Ammeter Ohmmeter
Trisonic Portable Digital Multimeter LCD AC DC Voltage Electronic Meter Tester Voltmeter TS-F309 New Arrival Digital Multimeter Portable Multi Meter AC/DC voltage meter DC Ammeter Resistance Tester Voltmeter Ammeter Ohmmeter Multi-meter to measure amps. Uni-T UT139C Digital Multimeter Review. How to Use a MULTIMETER - Beginners Guide (Measuring Volts, resistance, continuity & Amps). Subscribe this video, Check Voltage and Earthing Through Multimeter.. Yeeco® Digital Multimeter Voltmeter Ammeter DC 6.5-100V 20A review. RM101 Digital Multimeter 6000 counts Backlight AC/DC Ammeter Voltmeter Ohm Portable Meter voltage meter RICHMETERS. . How To use MULTIMETER PRACTICAL Class in TAMIL. Digital Voltmeter Ammeter Ohmmeter Multimeter Volt AC DC Tester Clamp Meter Features: Portable LCD Multimeter AC DC Voltage Electronic NEW Digital …. . How To Use Digital Multimeter. Digital Multimeter Volt Meter Ammeter Ohmmeter OHM Tester XL 830L EXCEL B0215 eBay. заказать new xl830l digital multimeter portable multi Multimeter Portable multi meter AC/DC voltage digital multimeter portable multi meter ac dc. . How to measure AC Current Draw with a Clamp Multimeter. How to use a Multimeter for beginners: Part 1 - Voltage measurement / Multimeter tutorial. How to check dead mobile with multi-meter || Hindi. How To Test Standard AA, AAA, D, C, and 9V Batteries with a Multimeter. How To Measure Current (Amperes) & Why Ammeter Connected in series ( In Hindi). Multimeter basic tutorial for beginners|How to use Multimeter battery volt amp test bangla tutorial. Fluke 101 Basic Digital Multimeter Pocket Portable Meter Contact Voltage Detection Amp Ohm Volt Multi Meter Digital Multimeter, AC/DC Voltage. . Multimeter Basics for Preppers (AC, DC, and Ohms). Tacklife DM01M Digital Multimeter - Non Contact Voltage Detection. How to test a 9v AA AAA C or D Battery with a Cheap Multimeter. Multimeter in hindi. MUSTOOL MT66 True RMS 5999 Counts Digital Multimeter. Aneng An8008 Multimeter Review & Teardown. How to Test a Solar Panel Voltage and Current. Volmate Digital LCD Voltmeter Ammeter Ohmmeter Multimeter Volt AC DC Tester Meter Review. Southwire 21010N Clamp Meter. DM6266 LCD Digital Clamp Meter AC DC Current Voltage Resistance 100% Brand new and high Bside ADM92 TRMS Digital Multimeter Auto Range RMS 6000 Counts Multi. . How to measure DC/AC AMPS using a multimeter (Current). How to check A.C. voltage with Digital Multimeter.
New Arrival Digital Multimeter Portable Multi Meter AC/DC voltage meter DC Ammeter Resistance Tester Voltmeter Ammeter Ohmmeter
MXITA Magnetic spark plug wrench Spark Plug Socket Magnetic Removal Tool 14mm 16mm

MXITA Magnetic spark plug wrench Spark Plug Socket Magnetic Removal Tool 14mm 16mm
New Arrival 16pcs/Set 15-35mm Drill Bits Professional Forstner Woodworking Hole Saw Wood Cutter Wholesale Price

New Arrival 16pcs/Set 15-35mm Drill Bits Professional Forstner Woodworking Hole Saw Wood Cutter Wholesale Price
Big View Eara 4 Arc Sensor DIN5-DIN13 Solar Auto Darkening TIG MIG MMA Grinding Welding Mask/Helmet/Welder Cap/Welder Glasses

Big View Eara 4 Arc Sensor DIN5-DIN13 Solar Auto Darkening TIG MIG MMA Grinding Welding Mask/Helmet/Welder Cap/Welder Glasses
CNC Engraving Machine Parallel to USB conver Adapter USB MACH3 Wood Router Controller LY-USB100 UC100

CNC Engraving Machine Parallel to USB conver Adapter USB MACH3 Wood Router Controller LY-USB100 UC100
Auto Darkening Welding Helmet Arc Tig Mig Grinding Welders Mask Solar Power Red
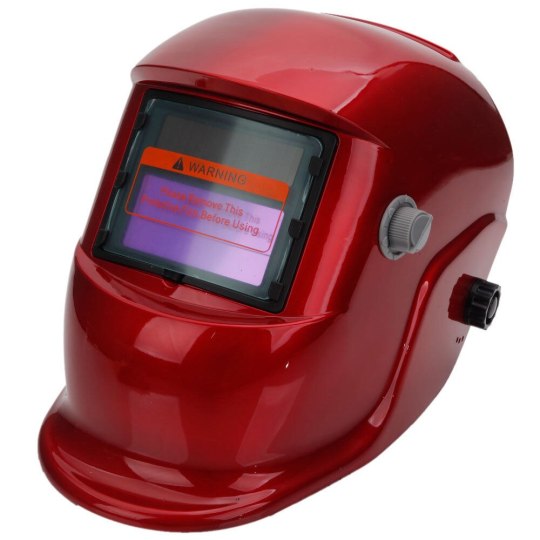
Auto Darkening Welding Helmet Arc Tig Mig Grinding Welders Mask Solar Power Red
LOKI HOT Straight knife high carbon steel Fixed Blade Rosewood Handle Hunting Survival Tactical Outdoor Camping Knife EDC Tools
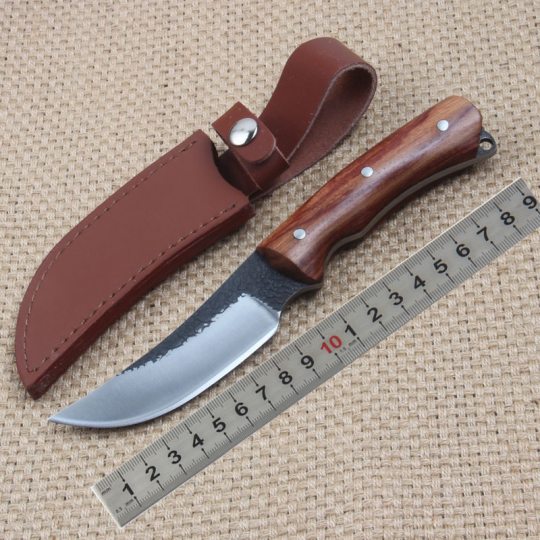
LOKI HOT Straight knife high carbon steel Fixed Blade Rosewood Handle Hunting Survival Tactical Outdoor Camping Knife EDC Tools
MD5008 Professionl Industrial Metal Detector Undeground Gold Big Coin and Small Coin Digger Seeker Treasure Hunter Finder
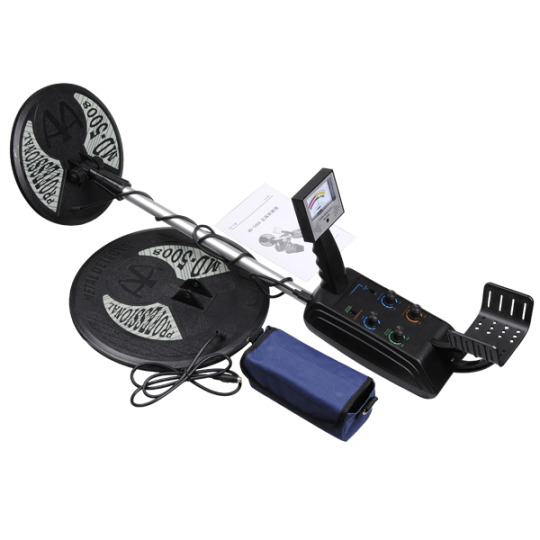
MD5008 Professionl Industrial Metal Detector Undeground Gold Big Coin and Small Coin Digger Seeker Treasure Hunter Finder
100mm angle grinder/electric grinder/power tools
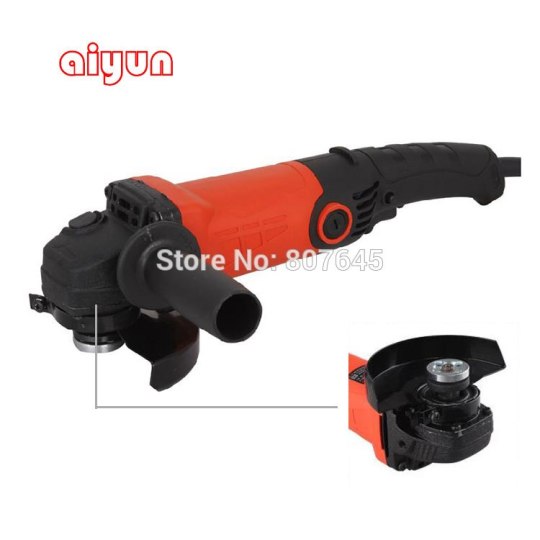
100mm angle grinder/electric grinder/power tools
FATCOOL Hot Sell 6inch /150mm LCD Digital Electronic Carbon Fiber Vernier Caliper Micrometer Measurement Tool Free Shipping
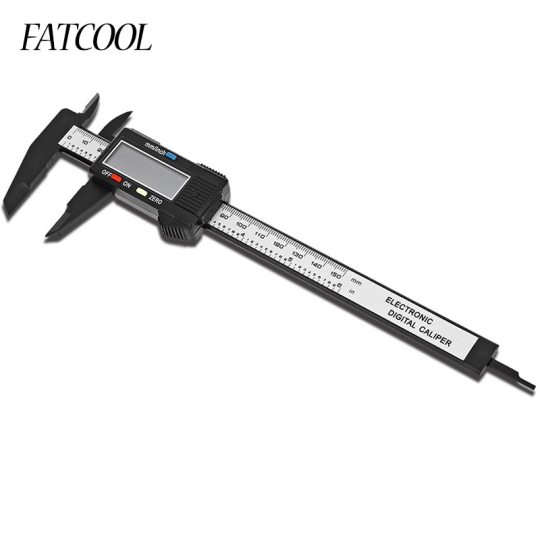
FATCOOL Hot Sell 6inch /150mm LCD Digital Electronic Carbon Fiber Vernier Caliper Micrometer Measurement Tool Free Shipping
Newest ISDS205X 5 in1 Oscilloscope Analog Virtual Oscilloscopes,spectrum analyzers,data loggers,logic analyzers,DDS source
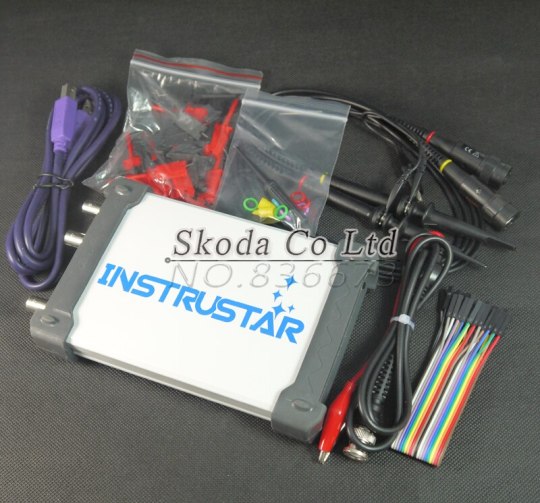
Newest ISDS205X 5 in1 Oscilloscope Analog Virtual Oscilloscopes,spectrum analyzers,data loggers,logic analyzers,DDS source
Full Tang Tactical Fixed Knives,DC53 Blade G10 Handle Camping Survival Knife,Hunting Knife.
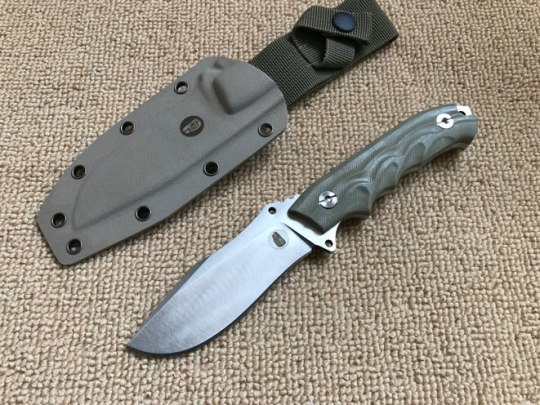
Full Tang Tactical Fixed Knives,DC53 Blade G10 Handle Camping Survival Knife,Hunting Knife.
1pcs Precise Screwdriver High Quality S2 Precision Screwdrivers Torx Philips Slotted For Repair Cellphone Laptop PC Clock
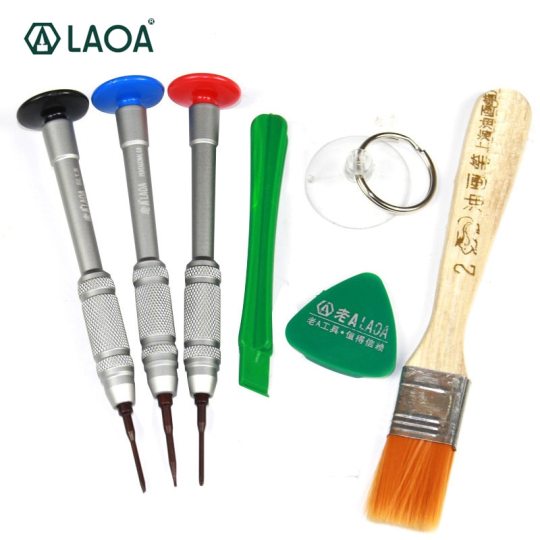
1pcs Precise Screwdriver High Quality S2 Precision Screwdrivers Torx Philips Slotted For Repair Cellphone Laptop PC Clock
DVP16ES200T New Original ES2 series 100-240VAC 8DI 8DO PLC * 1pcs in Box

DVP16ES200T New Original ES2 series 100-240VAC 8DI 8DO PLC * 1pcs in Box
0 notes
Text
About my “lab”
Welcome to my electronic lab! Over the last few years or so many people asked me about my personal lab, so today I am giving you a virtual tour of it.
We will go over what gear I use and how I set everything up so I can do my experiment efficiently. Along the way I will answer the questions that has been asked about my setup in my various posts. In particular, I will provide a rationale of why I choose one type of hardware versus another. The quantity of hardware described in this post might seems overwhelming but keep in mind here that it took me years to build this lab. I merely add a new piece here and there based of my needs and opportunity.
Disclaimer: I don’t claim my setup is the best but it works for my use-cases: tinkering with electronic, doing security research and repairing various pieces of equipment. If you have suggestions on how to improve it, let me know.
Overall setup
All my equipment is installed on a big and stable desk that I bought from IKEA (BEKANT model). As extra storage room, I used an extra thick shelf from IKEA as well (LACK model). Sadly the brackets (IKEA Ekby Töre model) used to fix the shelf to the desk without drilling are discontinued which prevents me from adding an additional shelf. If you know a place where I can find a similar product let me know.
All units are connected to an Intel NUC Swift Canyon barebone either via Ethernet or via USB when Ethernet is not supported. The NUC has 32GB of RAM and a 512GB SSD. This small PC allows me to handle the firmware upgrades, capturing screenshots of the different gears at once, handle the software defined radio (SDR) through its front USB3 port, dump NAND flash memories, etc. And the form factor is just great, leaving most of the space free. The 23” LCD screen is mounted on a Ergotron articulated arm. Again, the rationale here is just to keep the workspace clean.
To avoid damaging the wood of the desk, I put an ESD mat from Vermason. It provides a good protection and also has a standard ESD stud on each corner. I’m using that have a standard ESD wristband and the soldering station is also connected to it. I never felt that ESD protection was mandatory but considering that the mat was the most expensive piece in having the ESD setup done, I thought it was worth buying the few cables required to connect the mat to the ground through a 1M resistor and have the soldering iron properly connected too.
Finally, to provide power to everything on the desk, I am using a huge outlet (thanks to the very efficient form factor of the Swiss power plugs compared to the big fatty European one that I had to use when I was living in France) that provides me not less than 16 plugs!
Soldering, desoldering, and accessories
Of course we couldn’t talk about an electronic lab without starting with soldering and desoldering equipment. No matter what you’re doing, it’s really mandatory to have a soldering iron where you can control the temperature. Otherwise it’s like being a butcher who only uses an axe to cut the meat. I used noname stations for a while but at the end it always ended up the same way: something breaks or you want to change the tip of the iron but the model is discontinued and you cannot find spare parts anymore. So I decided to stay with a known brand and I bought a JBC soldering station. Be careful, it is super expensive. Really! But it is also amazingly good. It heats up almost instantly, I can have up to 4 different irons connected to the control station, I can change the tip of the iron in 2 seconds without burning my fingers. It’s just fantastic and modular but I also acknowledge that not everyone can afford it and may prefer cheaper alternatives such as Weller or Hakko which are very good too. I use a DME-2A control station with 3 tools (and stands):
a T245 iron for general purpose soldering (through hole component, drag soldering SMD, etc.) with tips/cartridges C245-102 (2mm bevel tip), C245-759 (2.4mm chisel) and C245-931 (2.7mm spoon)
a T210 iron for precision soldering with the cartridge C210-019 (0.2mm chisel)
a PA120 micro-tweezers iron with C120-002 (0.2mm tip) which is pretty convenient for soldering or reworking SMD components, especially the small form factors such as 0402 or smaller.
For desoldering, nothing beat a hot air gun. Classically hot air guns are provided in the shape of a big chunky control station with an embedded air pump. I used to have such station but it was big, heavy, the cable transporting the hot air was warm, the air flow was somehow disappointing (ok, it was a noname station so it was definitely not a high end one), and at some point the air pump died. Finally, after seeing a review from Dave Jones (EEVblog), I opted out for the tiny cheap Atten 858D+ station and honestly it just works perfectly well for me. Even if it breaks at some point, it’s nothing but a radial fan in the gun and a heating element in the nozzle. It’s just super easy to service.
One need to protect his lungs because even if we have two, the second one is not there for high availability. So it’s important to have a fume extractor. Nothing fancy here. I just bought an extra filter from the beginning. If you think a fume extractor is not necessary, I encourage you to watch the video from Louis Rossmann on Youtube.
Finally, you will also need some accessories such as a tip cleaner, tweezers, soldering wick, flux, solder, and side cutters. I haven’t put links everywhere because there’s nothing too critical except the diameter of the solder: just be aware that to do very fine pitch soldering, you need to have a very fine diameter solder. Soldering 0.5mm (or less) pitch components is not going to work well with a 2mm diameter solder.
Another accessory that I added recently to my setup is a PCB holder. After having spent quite some time looking on the Internet, I opted for PCBite and it’s really really good. Sturdy, durable, comfortable to use. I even think about buying a second set.
Inspection
As soon as you start soldering SMD, you may want to have a closer look at what you did to ensure that all the solder joint are done correctly. And for that, nothing beats a real optical microscope. You may think that a USB microscope may do the job or that a magnification glass/lamp could be enough. I tried them and they will never provide the same kind of feedback. Using a USB microscope that will show you things on a remote screen is a bit awkward because you’re moving your hands but you’re not looking at them. Maybe it’s just a matter of habit but I didn’t like it. And with the magnification glass, I was lacking the feeling of depth: having both eyes looking through it, it couldn’t reliably tell which hand was on top of the other. So, since the beginning I was using a binocular microscope. But then, with the blog or for publications, I wanted to take pictures of what I was seeing through it. Also on my previous microscope the working distance was pretty small and soldering without having the iron touch the microscope and burn it sometimes implied some uncomfortable positions for my hands. So I recently upgraded that microscope for an AmScope trinocular SM-8TZ-144S-10M. Again, the rationale behind the choice of the articulated arm is that I can push the microscope away when I don’t need it, freeing some space. The trinocular setup allows me to mount a proper Bresser 1080p HD camera on it. I replaced the 10MP camera that was provided because the videos were not as smooth and I would like to be able to shoot some movies of my work in the future. The only disappointment here is that the microscope is not simul-focal. This means that I have to choose between the camera and the left eyepiece; I can’t have both of them at the same time. If I had to rethink that choice, I would definitely go for a simul-focal model. The camera is connected through HDMI (the USB2 output could not sustain full HD resolution at 30fps) to a Magewell XI100DUSB-HDMI capture dongle that sends the feed to the NUC.
Measuring
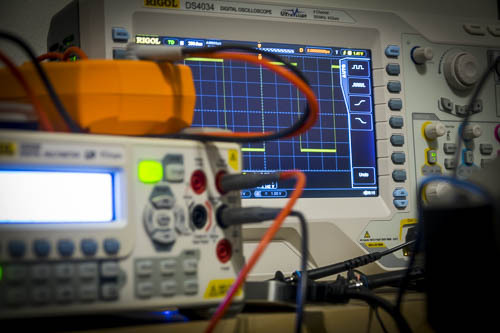
The oscilloscope is for the electronics what a good debugger is to a developer or a reverse engineer: a must-have. My first digital oscilloscope was a Mixed Signal Oscilloscope (MSO). But I was a bit disappointed of the logic analyzer and honestly I had no use of having both the analog and the digital signals on the same tiny screen. Therefore I changed it to a Rigol DS4034 oscilloscope. There was recently a sale and it came with the full bundle of options (all protocol decoders, advanced trigger options, and a bandwidth upgrade included) for free which makes it actually a Rigol DS4054 with 500MHz bandwidth. It has a very wide screen and while 2 channels would cover most of my need, there are times when 4 channels are necessary. Unfortunately, the software Rigol provides is not the same quality as their scopes: even with a 100Mbit/s Ethernet link, the UI is not fluid at all. It’s enough to make high quality screenshots without using a USB key but it’s unusable to make video or even control your scope in real time actually. An alternative software called Rigol UltraVision Utilities is available for free on the EEVblog forum and is much better than the official software. But the refresh rate is still not enough for good videos so I may consider in the future using the VGA output of the scope and plug it into a USB capture card connected to the NUC.
An oscilloscope is not enough though; you also need multimeters. And yes, I’ve written that in plurals because you may think about having 2 multimeters: one for measuring the current and the other one for the voltage for example. I’m using a Rigol DM3068 bench multimeter. It has a superb accuracy (6½ digits), covers great ranges of measurements and provides 4 terminal measurements if needed for a reasonable price. The only bad thing about it is that the continuity tester is really slow (i.e. the time between you probing a circuit and hearing the multimeter emitting a beep is long). For my second multimeter I chose a handheld model, an Agilent U1273AX which is a really good piece of gear. Of course, as you would expect if you’ve followed my philosophy when it comes to choosing equipment, I also bought the infrared to USB cable to stream the results back to the NUC.
Nowadays most the electronic world and protocols we can see on a given device are digital and to have a closer look at those, we need a logic analyzer. Like many others, I picked a Saleae Logic one, more precisely the Pro 16 model. Pros are that it simply streams the samples to the computer, it does that over USB3, can sample at up to 100MHz, and has an SDK to allow you to write your own decoder. The main drawback for me is that the samples have to be buffered on the computer and only when you stop capturing you can see them on screen and use decoders. I would prefer to have a “real-time” option here. Also the 100MHz sampling frequency can be an issue when the bus you are looking at goes above 50MHz due to Nyquist limit.
Finally, because I also do some electronic repairs, I added to the lab a programmable electronic load. This allows me to easily test power rails which are usually the first thing to fail on a device, by setting constant current, constant voltage, constant resistance or constant power mode. Very handy to test those cheap power adaptors. Mine is a BK Precision 8601, connected to the NUC over USB.
Powering
Should you be experimenting, prototyping or analyzing an equipment, you will need to power the device in a long term, reliable way. And for that you will need a bench power supply. Mine is a Rigol DP832A that I haven’t chosen for it’s cheesy colors on the front panel but for its high precision.
To complement my setup I also added last year an arbitrary waveform function generator, or ArbGen, a Rigol DG1062Z. I kept it with the native 8Mpts memory even though it has physically 16Mpts memory inside and can be unlocked through a software license upgrade. But I’m not using it to generate complex signals at the moment therefore 8Mpts is plenty enough.
Prototyping, debugging, reverse engineering
Another essential piece of equipment that you will need are breadboards. They allow you to quickly prototype something without soldering anything. And to be complete here, you will also need jumper cables here. Personally I bought fairly expensive ones from Schmartboard but they are more durable than the cheap alternatives which tend to break easily. I have an assortment of male-male, male-female and female-female cables.
To easily interface with any device, I also have a bunch of Teensy 3.2. I just love their form factor and they are very powerful: with overclocking, the Teensy 3.2 can go at 96MHz and it embeds a DSP for complex math computation! I also have a RaspberryPi 2.
If you have read my previous articles or if you follow me on Twitter, you should already know that I also have most of the boards derived from the GoodFET project: GoodFET, FaceDancer (USB), GoodThopter (CAN bus) and ApiMote (Zigbee).
I also have a bunch of FTDI development modules such as the FT2232H, FT4232H and UM232H. They can be used to dump NAND memory, quickly interface with serials protocols such as RS232 or RS485 and also act as a fairly fast (~20MHz) JTAG interface that is compatible with OpenOCD. The smaller module even comes in a breadboard-friendly format.
To deal with (E)EPROMs and/or flash memory chips I have a TNM5000 with all the adapters, including the optional TSOP56 for NOR flash that I had to buy separately. I also have a PICkit2 and a PICkit3. The main reason about having both is that the PICkit2 is compatible with Linux. But newer Microchip MCUs require a PICkit3.
When it comes to RFID, I have a Proxmark3 from RiscCorp that I recently upgraded to Proxmark3 RDV2. It comes with much better antennas (sometimes they are a bit too good actually) and in a nicer form factor without the stupid Hirose to USB cable. Also it has a more modern micro-USB plug instead of a mini-USB.
For radio frequency investigations, I have bladeRF x115 since I was part of the Kickstarter campaign with its optional transverter XB-200 for lower frequencies. But that’s not a surprise considering that I am the author and maintainer of the SDRSharp plugin for it.
I also have a bunch of Chipcon/Texas Instrument dongles: CC1111EMK, CC2511EMK and CC2540EMK. They are very handy to quickly deal with some sub-GHz protocol with RFcat or to sniff at Bluetooth LE packets. I also have the complementary Chipcon debugger which allows in conjunction with SmartRF Studio to experiment easily and reflash the dongles with the RFcat firmware (but a GoodFET would have been enough for that purpose).
In order to deal more specifically with Bluetooth and Bluetooth LE protocols, I have an Ubertooth One dongle
I also participated at the crowd funding campaign of Chipwhisperer but I haven’t got the time yet to go through all the documentation and tutorials to use it effectively.
And for more high speed or complex protocols, I have a Terasic Altera Cyclone IV FPGA development kit which allows me through its extensive set of mezzanine boards and GPIOs to interface with pretty much everything provided I spend enough time writing Verilog/VHDL for that.
Conclusion
It makes a quite long article and I hesitated to cut it into several parts but as some choices I made are somehow linked between the categories, I thought it would make more sense to have everything in one single article. I also hope that it will be helpful to some of you and don’t hesitate to tell me in the comments section.
0 notes
Text

#ajitek#ZYNQ FPGA BOARDS#USB RELAY MODULES#PC USB Oscilloscope with Logic Analyzer#PC USB OSCILLOSCOPES#ARTIX FPGA BOARDS
0 notes
Text

#ajitek#ETHERNET RELAY MODULE#ZYNQ FPGA BOARDS#USB RELAY MODULES#PC USB Oscilloscope with Logic Analyzer#PC USB OSCILLOSCOPES#ARTIX FPGA BOARDS
0 notes